
Filming in HLG
At long last I have started the journey of creating content for my new YouTube channel! I got my Sony a6400 switched from manual mode to video mode and also changed the recording profile from S-Log to HLG. Since the a6400 doesn't record 10-bit video, there isn't enough data to truly take advantage of the dynamic range provided by S-Log and cineform. I would be putting in the work to correct it and not get improved visuals
Filming with HLG (hybrid log gamma) on the other hand—this profile adds more dynamic range and HDR data while not being so severe in the flat look. This gives me improved colour grading capabilities that fit within the limitations of the camera itself.
All Good Until Exporting
I imported the footage into Premiere Pro and got my video edited. I applied colour correction and grading with Lumetri Color and got the footage to a look I was quite happy with! Content with my work, I moved to the export window and… the video looked completely off?! Highlights were blown out and the shadows were crushed—it looked nothing like my edit! How is it that my footage looked exactly the way I wanted in the editor panel but looked completely off in the export panel? Time to do some research.
What Happened to the Colour Space Settings?
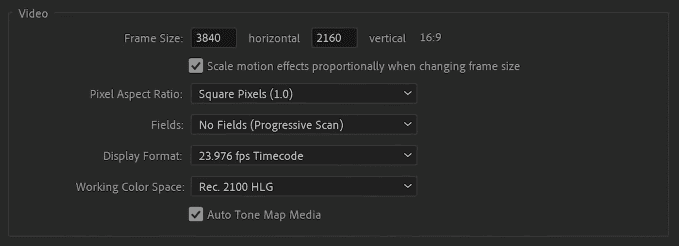
I found a couple really helpful videos from Straight To The Point and Jordan K. Graff on YouTube—short and sweet vids with clear answers. Just what I needed! I needed to change the colour space for the sequence and apply the same setting change to the video files themselves. Pretty simple fix, right? I went into sequence settings to adjust the colour space so that the HLG footage would be converted into Rec709 colour space, but to my dismay I opened up the sequence settings and… the option for setting the colour space was gone 😱!
What the heck?! I thought it would be a few simple clicks and I'd be on my way to uploading the vid to YouTube in no time. Whelp, looks like plans changed. From the time the tutorial videos were posted, Adobe must have changed the location of these settings—it wouldn't make sense for them to get rid of them entirely. After poking around some more, I found many articles and comments telling me to do the same as what I had already tried. Meh!
Found at Long Last
I had resorted to clicking around all the windows I could in Premiere Pro to see where the settings were buried. I couldn't find them in the dropdown menus or preferences, hmmm… Then I found myself back at the Lumetri Color panel. All of the options from basic to creative are for correcting and grading the footage, why are the colour space settings not here?
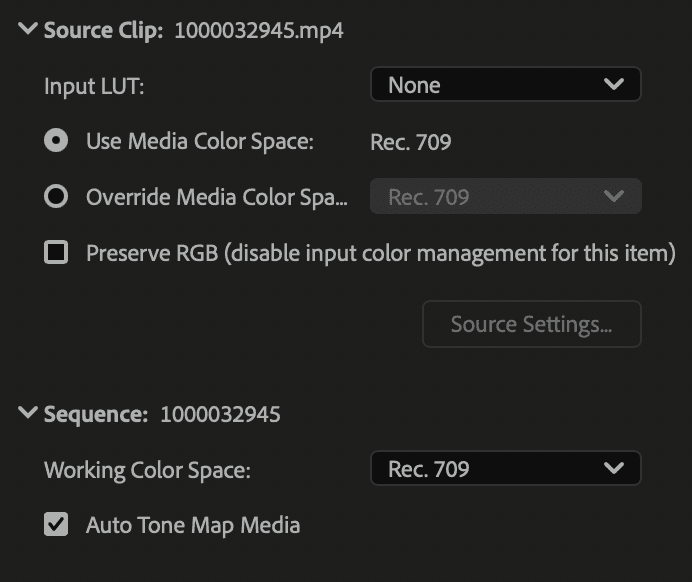
It was in this moment of scrolling that I was struck with a "dumb dumb" moment as I looked at the top of the panel and found a settings tab right next to the main Lumetri Color tab—maybe the answer I need is in there! Sure enough, the option to change the colour space for both the sequence and the individual video files were tucked in there, and right next to each other no less!
A Sensible Change?
The search was over! While the situation wasn't all that intense, I did have a growing feeling of concern about my ability to save the edit. Maybe I would have had to switch to Resolve and edit the whole thing again? A bit dramatic I think.
Not knowing where to look and seeing a bunch of information online that lead me to the old setting locations was a bit frustrating, but now that I know where the settings got moved to, I feel better about it. Part of me feels it's odd to remove the colour space option from project-level settings and moving it into adjustment layer settings, but at the same time you would be using an adjustment layer if you are editing HLG soooo.
Ultimately, I think moving the colour space settings together into Lumetri Color is a sensible move. Having it easily accessible in the panel where you are making your corrections and grading choices helps streamline the workflow, even if just a bit.

